

Why create a template? Simple: efficiency and consistency. Instead of manually typing out appointment confirmations, reminders, or follow-ups every time, a template lets you send a personalized, professional message in seconds. This ensures your communication is always clear, branded, and most importantly, saves your staff countless hours every week.
Follow these steps to create a new SMS template that includes both a short text message and a detailed web page (Message URL Content).
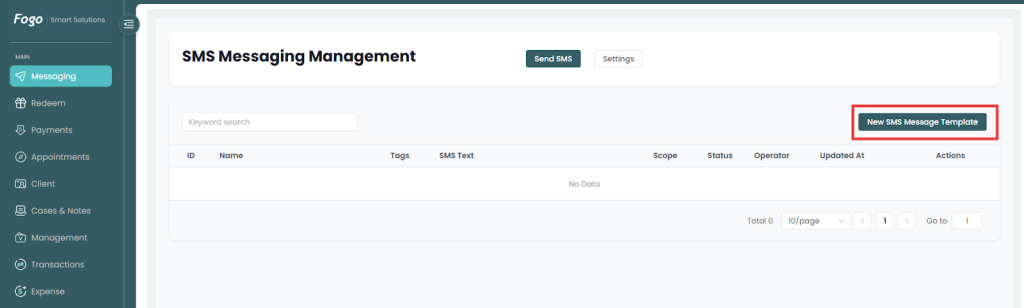
Step 1: Go to Messaging> New SMS Message Template.
Step 2. Define the Template
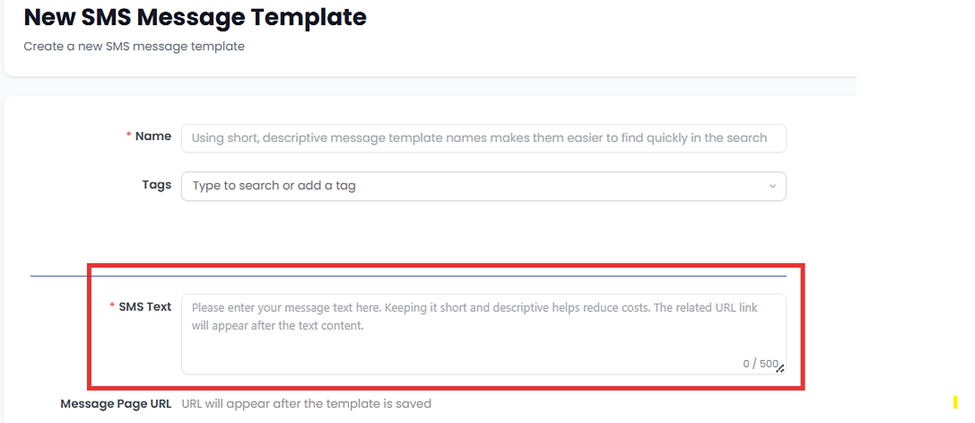
- Name: Enter a short, descriptive name for your template in the Name field. (Tip: Descriptive names make them easier to find quickly when searching.)
- Tags (Optional): Click into the Tags field to search or add relevant tags (e.g., “Reminder,” “Consent,” “Promotion”).

Step 3. Write the SMS Text Message. In the SMS Text field, enter the core message the recipient will receive on their phone.
Focus on keeping this text short and descriptive to help reduce costs.
The character count is limited (e.g., 500 characters max) and displayed in the bottom right corner.
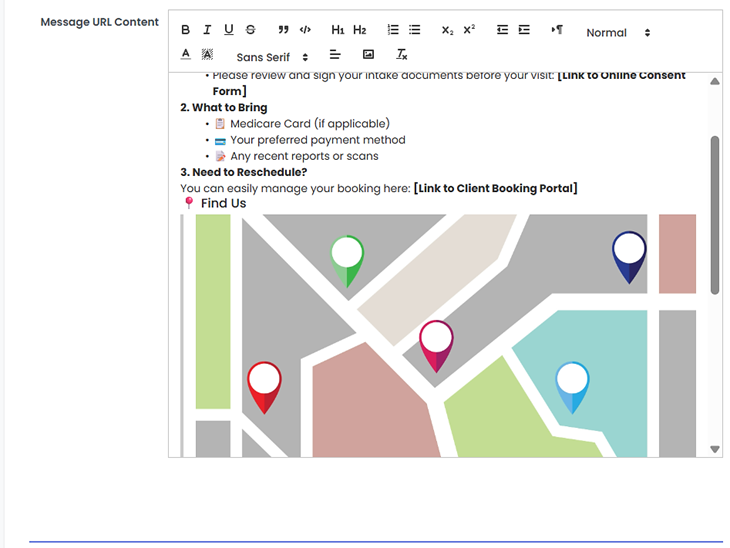
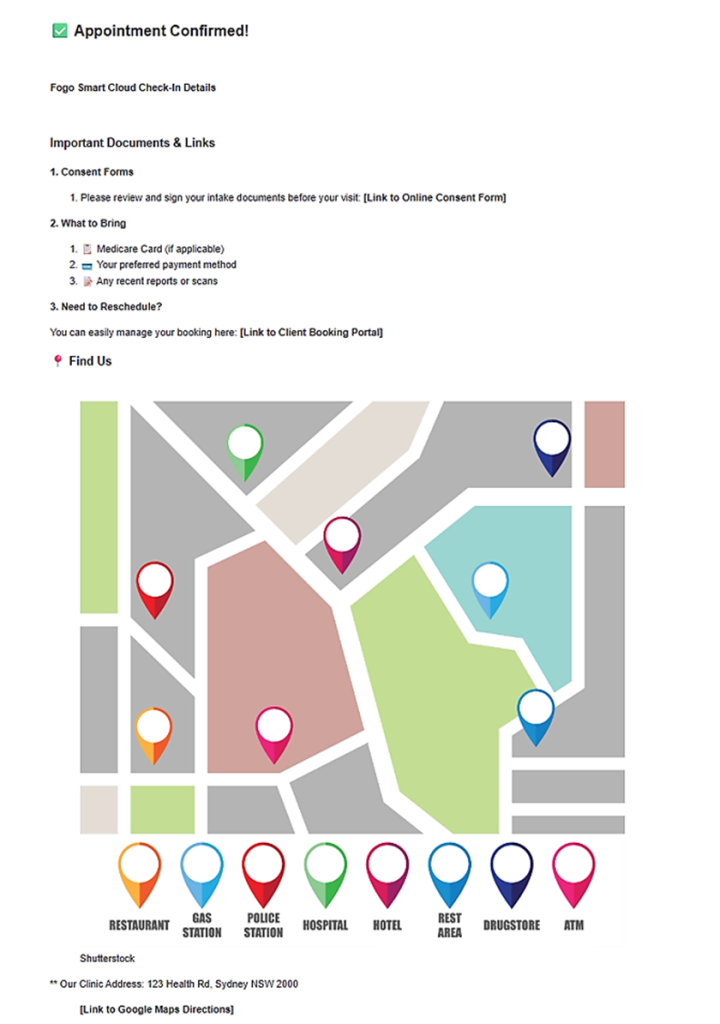
Step 4. Create the Linked Web Page Content. This content will appear on a web page when the recipient clicks the automatically generated URL.
Message URL Content: Use the rich text editor to create the detailed content you want to share. This section is designed for:
- Sending detailed consent information.
- Sharing special offers or promotions.
- Providing any other detailed client information.
- Formatting: Use the editor tools (Bolding, Lists, Headings, etc.) to format the content clearly.

Step 4: Once you have completed the required fields and entered your content, save the template to finalize and save your new template. The related URL link will automatically appear in the Message Page URL field after the template is saved.
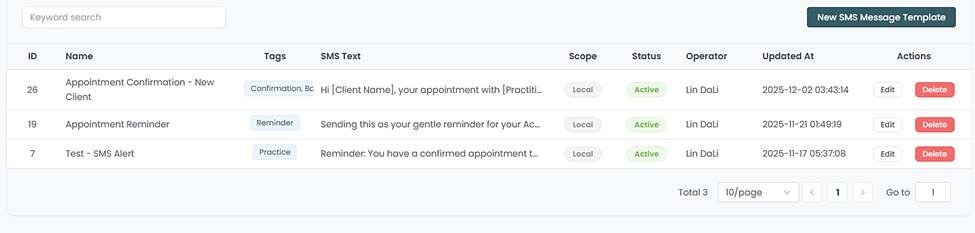
Once saved, your template will appear and you have the option to edit when necessary. Then set your SMS alert.
Step 5. To view your Message Page URL, click “Edit” then “Click to View”.
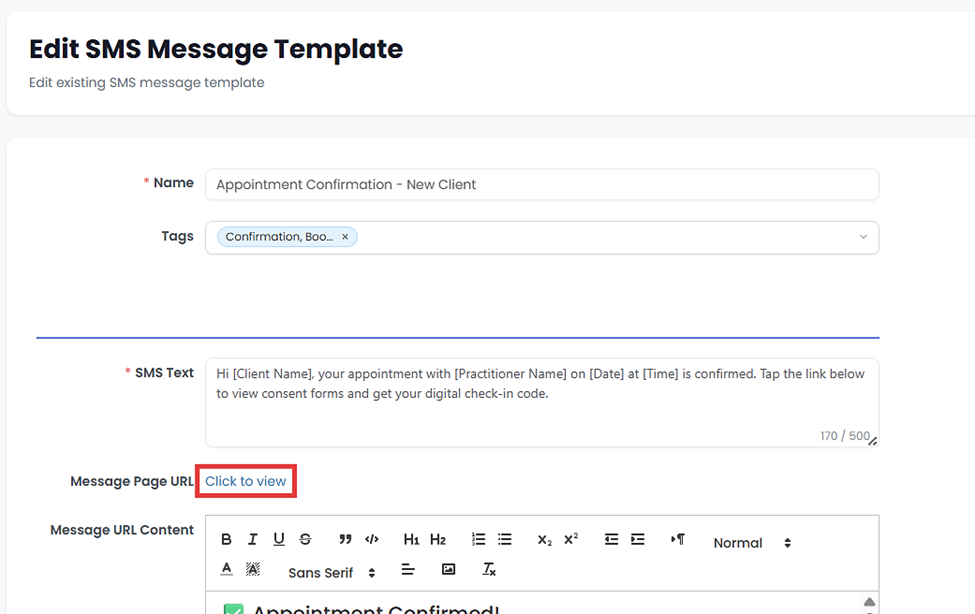
Step 6. The message content will be generated. Feel free to edit when necessary.
Need a demo or want to learn more? Email us at contact@fogo365.com.